Wednesday, December 19, 2018

Trailer Training: Step 1

The method I use to train horses to trailer willingly and without fear is not new.  You may have read about similar methods in horse training books and it has been used by a few horse trainers that I have known.  This method is successful with horses that are fearful of trailers because it progresses slowly and makes them feel safe around the trailer.  Horses that do not have trailer anxiety can still benefit from Step 1.

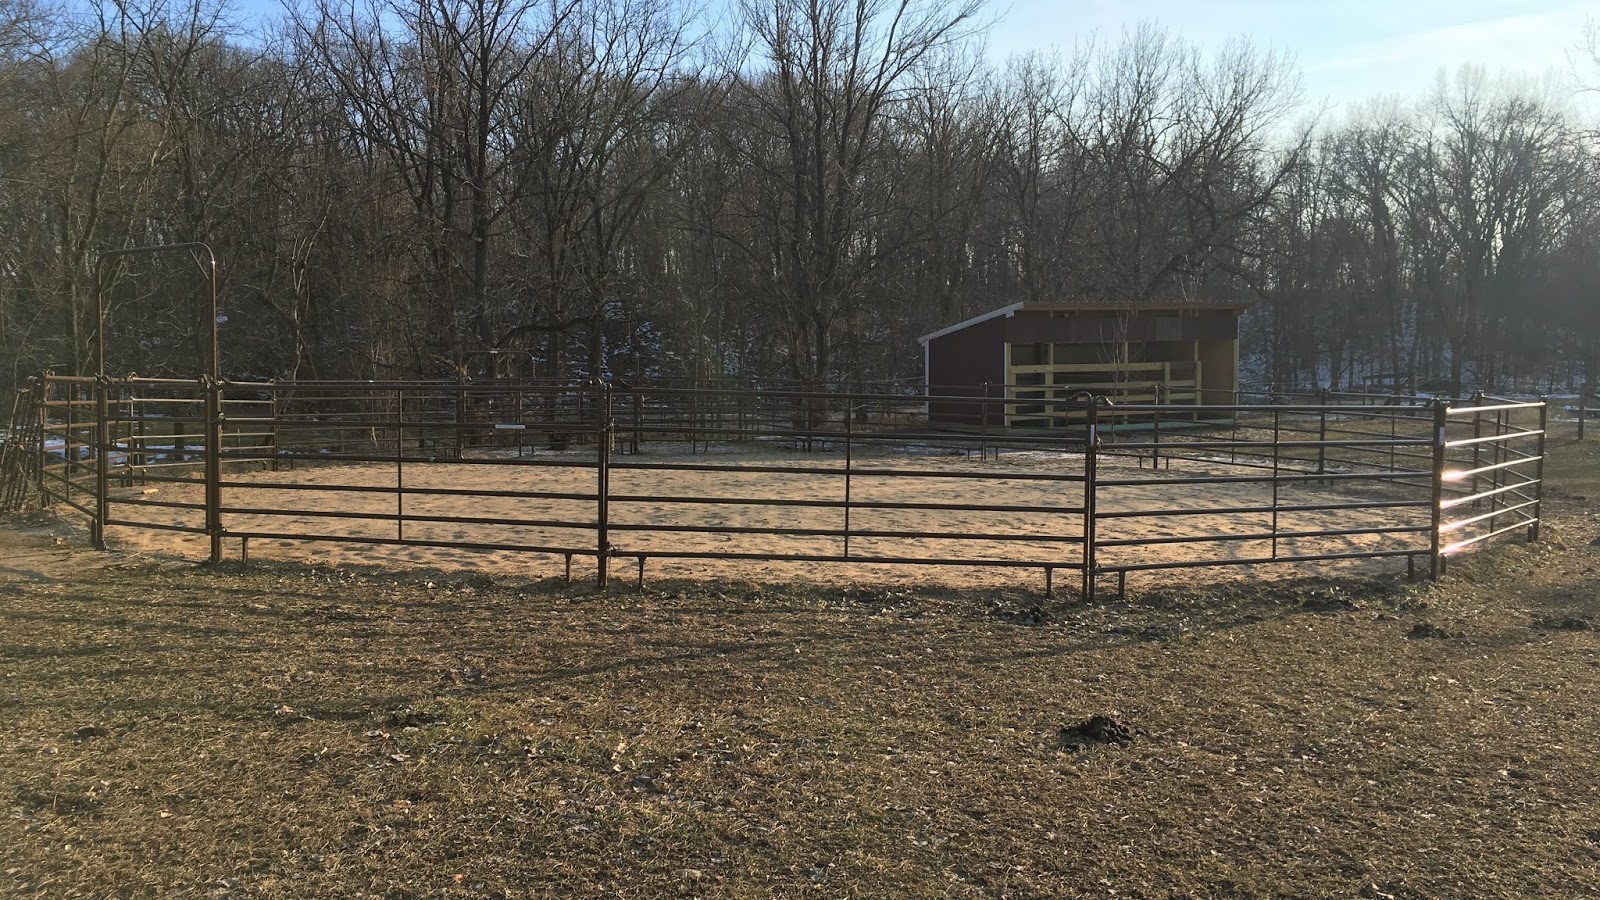
I back my trailer up to the gate of my 60' round pen.  It gives me plenty of room to work with the horse, but keeps them contained enough that I can keep them close to the trailer.  I like to keep my trailer on the outside of the enclosure to give the horse less surface area for chewing and damaging my trailer.
What you need:
  •          Trailer
  •          Enclosed Area
The trailer can be parked inside the enclosed area or backed up to a gate.  The trailer’s tires should be blocked so that the horse can go in and out of the trailer without it rolling around.  I have backed the trailer up to the gate of a paddock or have created a fence around it.  This step works best in an area that does not have vegetation (a dirt lot).

The Goal:  The horse associates the trailer with something “good” (food).  The horse accepts your presence in the trailer with him.

Once the trailer is secured, the back door of the trailer should be left open.  If it is a slant load trailer, the partitions should be removed or secured open so that the horse has as much room as possible.  All of the horse’s food should be placed inside the trailer.  For some horses that are especially wary of the trailer, the food may have to be placed closer to the opening for the first few days.  The horse should be allowed to go in and out of the trailer as he pleases.  Do not offer any food except what is inside the trailer.  It is normal in the beginning for the horse to grab a bite of hay and quickly exit the trailer and eat it outside.  Eventually he should relax and be able to eat his food inside the trailer.  Continue to feed the horse in the trailer until the horse seems relaxed.

Training Plan Example:

Day 1: Place the food inside the trailer where the horse can just barely reach it by stretching out his neck.

Day 2: Place the food where the horse must put both front feet into the trailer.

Day 3: Place the food where the horse must put all four feet into the trailer.

Day 4: Place the food at the very front of the trailer.

Next, the horse must learn to accept your presence in the trailer with him.  Using grain at this step can be helpful.  The grain should only be available when you are standing in the trailer.  For some horses, you may have to start back at Day 1 with placing the grain so the horse can just barely reach it without stepping in the trailer.  Each day, move the grain farther into the trailer until you can stand next to your horse all the way inside the trailer while he eats his grain.

Once your horse is relaxed with you in the trailer and willingly stands inside the trailer for extended periods of time, you can move to Step 2!

Case Study: Zeke

I began Step 1 with Zeke last fall.   The first day, Zeke spent very little time in the trailer, especially when I was close enough where I could have shut the door.  He went in, grabbed a bit of hay, and jumped out to chew the hay.  Over the next several days, he spent more time in the trailer and was less concerned when I was nearby.  By the end of the week, I was able to stand in the trailer with him. I ended up having to use the trailer about a week later and never got around to parking it back in his pen.

When I got the trailer back out this spring, I started back at Step 1.  As soon as I opened the round pen gate, Zeke jumped into the trailer.  This was a really great sign that he remembered the food reward from last fall and was not concerned about the trailer being there.  He readily accepted my presence with him in the trailer and we moved on to Step 2.

Wednesday, December 5, 2018

Training Horse Profile: Copper

Training Goals:
  • Walk, trot, and canter under saddle without bucking
  • Desensitized to rear cinch
  • Desensitized to spurs
I have this cute little guy for a short two weeks. Copper has had a lot of love and handling in his two years of life and is a very friendly guy. His training will be very basic as the owner would like to do most of his training themselves. My job is to get him started enough so that is safe for them to take over. Two weeks is a pretty short time to get a horse cantering under saddle, so I have my work cut out for me.


Session 1:  Boy, is he a little guy.  I put a pony girth on my saddle and it is barely short enough for him! I have the girth almost touching the ring on my saddle on the offside and it is nearly as close on the left side. I had to shorten up the rear cinch quite a bit as well.
I always start with lunging/round penning so I can establish a relationship with the horse and see how he responds to me.  I also want to establish forward movement through voice cues, which is helpful when we are actually ready to ride. We started off a little rough as Copper tested the boundaries and my personal space bubble.  By the end of the session I had that sorted out and he was responding better to my body language and voice cues. Lots of bucking happened as he felt the rear cinch move against his belly.
Session 2:  I saddled Copper up and started again with round penning.  I was planning on starting ground driving with him but I discovered that I needed to punch more holes in my bridle to make it fit his tiny head properly.  Instead, we worked on some other ground work and voice cues. Less bucking today.

Session 3: I began today with reviewing round penning to warm Copper up and get his attention on me. Last night, I punched more holes in my bridle so that we could begin ground driving today. I am using the Driving from Behind method (more on that here: Ground Driving). He caught on very quickly to turning and backing up. He fought the bit some when stopping, but it was pretty good for his first day.
Preparing for his first ground driving lesson.
Session 4: Reviewed round penning and ground driving.  After he was warmed up and responding well to the pressure on the bit, I desensitized him more to the saddle: shaking the saddle, slapping the saddle, flopping the stirrups against his belly, etc.  I did this on both sides. I do this because I want the horse to be used to a variety of sounds and movements from the saddle so they are less likely to be spooked by them when I am on their back. Some people choose to spend less time on this type of stuff, but I prefer to try and prevent as much jumping around as possible! After desensitizing him to the saddle, I put one foot in the stirrup and jumped next to him, standing up in the stirrup every few jumps. I repeated this on both sides.  He stood still and did not seem very concerned about it. He looks ready for his first ride tomorrow!
Practicing Ground Driving
Session 5:  I began today by warming him up for a few minutes with round penning.  I wanted to get out his extra energy and any bucks before I hopped on.  He stood quietly while I mounted and I flexed his neck in both directions.  I then asked him to move forward through voice cues and some light leg pressure.

He doesn’t yet know what the leg pressure means, so I want to associate the ‘clucking’, which he knows means move, to the leg pressure.  I like to use light leg pressure in the beginning because he doesn’t yet understand what it means, and intensifying the leg pressure usually either causes them to shut down or start bucking—neither of which is particularly desirable.  It took a few minutes for him to figure out what I wanted him to do. Each time he stepped forward, I released the pressure (both verbal and physical) and let him think for a minute. It only took about a dozen repetitions for him to figure out what I was asking and then we were walking around the ring.  

Next, I practiced turning, stopping, and backing. This was relatively easy for him because he already had learned how to do it while ground driving. My last goal for the day was to get a little bit of trotting. He trotted several times for me in short bursts, and no bucking! I was very happy with his progress for the day.

Session 6: Today, my goal for Copper is more sustained trotting. As I only have four more sessions with him, I am also introducing the spurs. Because Copper does not have a lot of fat protecting his ribs, I am wrapping my spurs to give them a little bit of cushion (more on that, here). I started with the spurs on the ground so that he learned what they felt like before I am on his back. He did not have much of a reaction to me manually pressing the spurs against his sides, so I think we are good to go.

Since I want to keep Copper trotting, I am carrying a crop to help encourage him forward. I often use a crop during the first few rides because it helps get the forward movement I am looking for when I find that leg pressure is not working. Combining the crop with the leg pressure usually helps the horse to understand what I am looking for and is only needed for a couple of sessions. Copper did great with the spurs and with trotting. He is a fast learner!

Session 7: Today, I am introducing Copper to the canter! I started with a few minutes of round penning to warm him up and make sure he wasn't overly energetic. Once he was ready to ride, I reviewed what he had learned so far at the walk and trot. He is turning very willingly and is quite soft in the mouth. To finish the training session, I asked him for the canter. I used vocal cues (kissing sound) and the crop to reinforce the light leg pressure. For his first canter, I am only looking for a couple of strides at a time. He cantered off nicely and behaved himself very well.

Session 8: I hopped on today without round penning him first to see how he would do. This did not seem to bother him and he worked well at the walk and trot. I asked him to canter earlier in the session so that he had more energy for sustained cantering. He did very well with his left lead, but struggled with his right. This was not surprising because he struggles to pick it up when lunging as well. Towards the end of the training session, he began to randomly stop while stretching his nose down to the ground. He stopped quite suddenly and it caught me off guard the first time. I had to work with him longer that I normally would so that I could correct the random stopping.

Session 9: It is raining and there is lots of thunder in the distance. Copper is not thrilled about working in the rain. He has not repeated the sudden stopping trick of yesterday, so apparently that was a one day thing. We worked on turning, stopping, and backing at the walk and trot, as well as more cantering. About halfway through the session, he decided that he would not travel clockwise, regardless of the gait. If I turned him to the right, he would stop and refuse to move. The only way he would start moving again is if I turned him to the left. It took a little while to convince him to go to the right.

Session 10: This is Copper's last day of training with me! The round pen was very wet today, so I had to be a little careful with cantering so he didn't slip. We did lots of transitions, circles of various sizes, and changes of direction. He is becoming much more responsive to cues!


Copper is doing extremely well at turning, stopping, and backing. He has a really nice trot and his canter is coming along. He struggles with his right lead, but more practice and building muscle will help him get that too. He and his owner have a bright future ahead of them!

Tuesday, November 13, 2018

Training Tip: Spurs

I like to use spurs on all of my horses once they reach a certain level of training. The reason for this is it allows me to give more specific leg cues and it allows me to be much more subtle with my leg. I do not advocate for using spurs in a way that would leave marks or bruising on the horse’s sides. If you have a pair of spurs that is causing your horse to overreact when used correctly, (some horses have more sensitive skin or have less fat on the rib cage), use this trick:

What You Need:
  • Spurs
  • 2 Cotton Balls 
  • Tape 
  • Vetrap 
What you Need
Directions:

Step 1: Take a cotton ball and place it on the end of the spur.  It takes a little trial and error to figure out how to position the cotton, depending on the type of spur.

Step 1
Step 2: Secure the cotton with tape so that it won’t move when you wrap it in step 4.

Step 2
Step 3: Cut the vetrap in half (to make two thinner strips), about 8-10 inches long.

Step 3
Step 4: Wrap the spur with the Vetrap. Be sure to wrap around the heel of the spur so that it won’t slide off the end.

Step 4
Now you have spurs that have a little bit of cushion to help you give more effective cues. This trick can be used with most types of spurs, whether English or Western! I wrap my spurs when I am introducing a horse to spurs and when I am riding a horse that is a little ribby.  The vetrap is quite durable and lasts several months before I need to re-wrap my spurs.

The Finished Product


Friday, November 2, 2018

Training Horse Profile: Augy

Training Goals:
  • Walk, trot, and canter under saddle without bucking
  • Trail experience
  • Cross water 
  • Traffic desensitizing
My first step in Augy's training plan was desensitizing him to the saddle and teaching him how to lunge.  He had been saddled a couple of times before, so this step wasn't a big deal for him.  I could tell right away that he was unfamiliar with lunging, but he caught on quickly.  I like to teach every horse I work with how to lunge or free lunge.  The reason for this is it allows them to move with the saddle on their back, feel the stirrups flapping against them, it gets out their extra energy before I get on, and it gives me the opportunity to teach the horse vocal cues.  My goal is to help the horse associate certain sounds (cluck, kiss) with forward movement.  This is helpful when you get first get on a green horse because they often don't respond to leg pressure with forward movement.  By teaching them that 'cluck' = 'move', they are then able to associate that leg pressure equals movement.  

Once he was fairly comfortable with the movement of the saddle on his back and the stirrups bouncing against his sides, I began to desensitize him to the action of a rider stepping up into the saddle.  The purpose of this exercise was to make sure he wasn't afraid of a rider being above him and on his back and to teach him to stand still during the mounting process.  I like to begin by jumping up and down on the ground next to the horse.  Then, I place my foot in the stirrup and bounce on my other foot.  Next, I will stand in the stirrup for a few seconds and then step back to the ground.  Finally,  I will actually swing my leg over and sit in the saddle.  I like to do theses exercises on both sides of the horse so that the rider can mount on either side if necessary.  Augy had zero issues with this process and consistently stood still.

Augy has a bit of an upside-down neck (or ewe neck).  This made it more difficult for him to get off of his forehand and round his neck.  Horses with ewe necks tend to like to stick their noses out and up (like a giraffe).
The next step for Augy was actually getting him to walk around the ring with a rider.  The first day that I asked him to walk off, it seemed to be going well.  Then, out of the blue, he exploded and we went for a couple of rough bucking laps around the round pen. He tried to go off a couple more times during the session, but now I was able to stop them pretty quickly.  I always like to end each session on a good note, so once he was able to walk calmly and respectfully around the ring a couple of times I got off and we were done for the day.  

Session 5: Today, I focused mainly on teaching him to respond to the pressure of the bit.  He is quite resistant to turning, so I asked him to flex both directions while stopped.  This helped him understand how to respond to the pressure and loosened up his neck and, as a result, his turns got much better.  The remainder of the session involved a lot of small circles and changes of direction.

Session 6 & 7: Now that Augy is behaving himself at the walk and turning by direct rein pressure, it is time to introduce the trot.  He is not responsive to leg pressure at this point and tends to freeze up if I push to much.  He responds to clucking but needs some additional encouragement to sustain the trot.  I discovered that using a crop on his side behind my leg was very effective at encouraging him forward without causing an overreaction.  In these sessions, I also worked a lot on turning and circling.  He was stiff to the left and frequently ran out his right shoulder (his head and neck would be turned to the left but he would continue to travel in the same direction as before) when he was asked to turn.  To help correct this, I applied outside leg pressure.  This blocked his right side and helped him to follow his nose in the correct direction.

Session 8 & 9:  I continued to work with him on trotting on command, sustaining the trot, turning, circling, stopping, and backing.  He is very resistant to backing and sticks his nose in the air to brace against the bit.  I hold the pressure on the reins until I get a release from the horse (dropping the nose towards the vertical or a step backwards).  With a horse like Augy, the first few releases are going to be very slight.  Eventually, I want every horse to round their neck and step backwards relatively quickly and without resistance against the bit.  To get to that point there are a lot of baby steps!  The final activity for the day was introducing the canter.  At this time, all I wanted was a couple of strides each direction without bucking.  Augy cantered off nicely and kept himself under control--a successful day!

Session 10: I started off the day in the round pen reviewing previous day's lessons.  I felt like I had enough control to take Augy on his first ride outside of the arena.  I started out in the pasture so that he would feel somewhat confined.  He didn't seem to be bothered by the open space, so I took him on a short trail ride.  He did really well and went everywhere I asked him to.  He mostly just tried to eat the grass along the sides of the trail.

Session 11:  After working in the round pen at the trot and a little bit of cantering, I unsaddled Augy to introduce him to the wooden bridge and creek on foot.  I like to cross the bridge on foot for the first time because the horse is more confident when following someone, and I am safe if the horse should decide to jump off the side.  Augy crossed the bridge with no issues.  Next, I took him to the creek to introduce him to crossing water.  He is really dislikes puddles so I thought that it would be more of a challenge than it was.  He followed me into the water after a slight hesitation and followed me up and down in the shallows.

Session 12: Back in the round pen today.  Augy did excellently with his left lead canter and was able to sustain it for several laps.  He was really struggling with the right lead and won't even try to pick up either lead when traveling counter-clockwise.

Session 13 & 14:  It was a tough beginning to the week.  Augy is displaying some new behavioral issues under saddle (biting at my leg, head tossing, generally irritated).  The arena work did not go well and Augy was definitely not into it.  I am going to switch things up tomorrow to see if that helps.

Sessions 15-17:  I switched to working Augy in the larger arena to change things up (hopefully resolve the behavioral problems) and give me more space to work on cantering.  He was much more willing to canter in the larger arena and picked up both leads correctly.  He is a little unbalanced and unsure of his feet so he struggled to maintain the canter in turns and circles.  I also changed things up by taking him out on the trails and riding him through the creek.  He really seemed to enjoy it and I it improved his overall attitude.

Sessions 18-20:  We got a ton of rain over the weekend and it has continued to rain each day this week.  The creek overflowed its banks and flooded my arena (happens each year at least once, unfortunately) and the round pen is super wet.  Even the trails are too wet to ride on.  Instead, I've been riding Augy on the road.  This is great desensitization for him because there are lots of "scary" things to see (mailboxes! garbage cans! flapping tarps!).  We live on a nice quiet road that runs to a fairly busy road.  This makes a perfect spot to desensitize horses to traffic.  I can start further away from the highway and let the horse see and hear the cars as they drive by.  As they are comfortable, I can move closer until they are standing at about the same distance that a car would pass them if they were riding along side of road.  I also did some riding along side of the road so that Augy could be passed both by coming towards him and coming up behind him.  He handled the traffic well and only got a little nervous when a loud cattle semi passed.


A happy trail pony at the end of training boot camp.
By the end of the 30 days, Augy was a pretty solid trail horse.  He responds fairly well to the bit and leg pressure.  He has plenty of fine tuning yet to be done, but he has a good start, and he and his owner will have many miles of trails ahead of them.
Thursday, October 4, 2018

Ground Driving

Ground driving is an excellent way to teach a green horse about bit pressure and how to steer, stop, and back up.  It can be done with younger horses that aren’t physically developed enough to start riding.  I like to take a few days to work on ground driving before the first ride.  That way, when I get on, the horse already knows how to respond to bit pressure (and the horse already knows how to go forward from my voice, from earlier ground lessons).  On the first ride, the only new thing the horse is going to experience is a rider on their back and leg pressure on their barrel.

Here I am driving Copper from behind, using the western saddle's stirrups to hold the driving lines.
What do you need?

·         Driving lines or two similar lunge lines
·         Western saddle or surcingle
·         Snaffle bit
·         Whip (if vocal cues aren't enough)

What is it?

Ground driving is exactly what it sounds like.  The handler “drives” the horse by walking on the ground instead of riding in a cart.  Ground driving is also called long lining by some trainers.  There are two methods of ground driving: walking behind the horse or driving the horse on a circle. 

Driving from Behind

The first is the easier of the two to get the hang of and it offers more versatility.  Because you are following the horse, it is easier to keep them from turning around and facing you and getting twisted in the lines.  You can also do more exercises such as weaving cones, figure-8, stopping, and backing up.  The main downside of this method is that it is more taxing on the trainer, as the trainer has to move at the pace of the horse.  Because you are following the horse, you need to pay attention to your proximity to the horse.  You don’t want to be in range if the horse decides to kick out.

Traveling Straight
The beginning of a right turn.
To drive from behind, the horse can be tacked up in a western saddle or a surcingle.  The western saddle will place the reins in a “low headset” position so it is not ideal for horses that naturally carry their heads/necks higher.  The surcingle will have three or more rings on each side, ranging from a “high headset” to about level headset.  When I drive a green horse from behind, I typically thread the lines through the lowest ring on the surcingle.  The bridle should be fitted to the horse normally and the lines should be attached to the bit on each side and then run through the stirrup or desired ring on the surcingle.  Tying the stirrups together underneath the horse will keep them in place while turning.  

When your lines are in place, stand behind the horse and encourage them to move forward either through voice commands or the whip (tap on the rump).  Once the horse is moving in a forward direction, you can ask for turns.  If the horse stops when you ask for a turn, use more forward encouragement.  Once the horse gets the hang of turning, you can practice stopping and backing up.  Reinforce the bit pressure with a verbal “whoa” and release pressure on the reins as soon as the horse stops moving forward (stopping) or at each step backwards (backing).

Driving on a Circle

Driving on a circle involves standing in the middle of the circle while the horse travels around you, similar to lunging.  In this method, you can have the horse both trot and canter with very little effort on your part.  The downside is that there is not much variety here and the horse can only be reversed by turning to the outside.  This can be confusing at first for the horse because they are used to turning to the inside during lunging exercise.  To add variety, practice changing between gaits, asking the horse to respond quickly to your cues.  You can also set up ground poles around the circle to help the horse regulate his stride and cause him to lift his legs higher (this strengthens the back muscles).

There are two ways that you can run the driving lines: behind the hocks or over the back.  Behind the hocks can be done with a surcingle or a western saddle.  Over the back can be done with a surcingle.  Driving over the back is a little trickier because as you reverse the horse, you will need to flip the line that is becoming the outside line over the horse’s rump and up on the back.   The main thing you need to watch when having the lines around the hocks is to not get to much slack when turning, or the horse could step over the line.  To turn, gather up more of the outside line as you release some of the inside line.  If your outside line is too long when he turns, he may end up stepping over the line once he is turned around.  Pull on the outside line and guide the horse as he turns away from you.  Make sure you have enough slack in your inside line so that he is able to turn away.  As he rejoins the circle traveling the opposite direction, adjust your lines so they are the right length.  Driving on a circle takes a little practice to get the hang of it, but it can be a helpful tool for training and exercising your horse.

Thursday, August 16, 2018

Training Horse Profile: Dasher


Last week, I had the privilege of having this sweet little mare for 7 days of training.  Her owner had only had her for about a month and wanted to know what she could do and what vices she had.  She was purchased off an auction, so her history was unknown. 


She was great on the trails and confidently crossed the wooden bridge and creek.  She left the other horses easily and did not throw a fit about being out on the trails by herself.  Her walk was perfect for the trails, as it was comfortable, yet not overly slow.  She had a nice moving trot that covered a lot of ground quickly.  Her canter was pretty rough for the first couple of days, but smoothed out as the week went on.  One of the most fun things about this horse was that she backed up really fast and could do fast hindquarter spins. She was an enjoyable ride and will make her owner a very pleasant trail horse!


Over the course of the week, I discovered a couple of issues that she had and worked to address them in the short period I had her with me.  Below are the three main issues she had and what I did to fix them: 

Issue #1: Tying

Dasher stood quietly while tied when she was by herself in the stall.  However, when I was near her or trying to brush or saddle her, she became very nervous and flighty.  The first couple days, she acted quite frantic, sort of like she was being bitten by flies (but there weren't any).  Her owner had also noticed this behavior the one time he had her tied up.

The Fix:

To solve her nervousness at being tied, I spent more time grooming and running my hands over her body.  I moved gently and quietly and reassured her with my voice that she was okay.  She had quite the mess of knots in her mane when she arrived, so this provided the perfect opportunity for additional grooming exposure.  By the end of the week, she was almost completely over her nervousness and was even falling asleep while being saddled.  

Issue #2: Rushing

Dasher was also very nervous and tense at the beginning of each ride.  As soon as I swung into the saddle, she was rushing off at the trot and travelling around the ring in a very stiff and tense manner.

The Fix:

This is one of those issues that just takes time to correct.  With each ride, the horse will gradually become more relaxed as they learn what to expect from the rider.  During the ride, to help the horse slow down and relax, I like to do lots of small circles.  As soon as the horse begins rushing, I guide them into a small (but easily trot-able) circle.  Once the horse slows down, I guide the horse back out onto the rail.  When the horse begins to rush again (usually after only a couple of steps in the beginning), I repeat the small circle.  With Dasher, this method helped her to relax and slow down within just a couple of minutes.

Issue #3: Dismounting

My preferred method of dismounting is to take both feet out of the stirrups and jump down (rather than step down).  This was one time I was very glad that I dismounted this way!  I found out when I jumped down that Dasher had a problem with shying away from the dismounting rider.  If I had dismounted by stepping down, my foot may have been caught in the stirrup and I may have been drug as she moved away from me.  I tested to see if she was frightened by me jumping down from the saddle by jumping next to her, which resulted in no flight response.  I then tested to see what her reaction would be to a step-down dismount, which resulted in the same response as my earlier dismount.

The Fix:

This is another issue that takes a lot of time and a lot of mounting and dismounting.  It is one of those training fixes that is rather tedious and boring to work on.  For Dasher, I sat quietly in the saddle until she was relaxed before I attempted a dismount.  I also placed her next to the fence so that she could not move away from me while I was dismounting.  This was effective because she moved away from me, rather than forward, so the fence prevented that movement.  Each time she stood still while I was dismounting she was praised.  Once she could consistently stand still next to the fence, dismounting could be practiced from the center of the arena.


Tuesday, June 19, 2018

Trailer Training for Fearful Horses

When I bought Zeke, he was not afraid of trailers.  His previous owner had a bumper pull stock trailer and had no issues loading him into that trailer.  Zeke was used to the open feel of the stock trailer and liked the extra room.  My limited budget could only afford a small two-horse bumper pull trailer that was built sometime in the 70’s.  The ceiling was low, it had very few air vents, and it was a tight fit.  In the beginning, Zeke refused to load in my trailer and I spent the next several weeks working with him.  He eventually learned to load easily and willingly and continued to do so for the next year.

My First Horse Trailer
For some reason, over the next couple of years his trailering anxiety increased to the point that it took 2-3 people to get him loaded and he could actually become dangerous in his desire to get away from the trailer.  Several well-meaning people attempted to help teach him to load, and their more aggressive methods only increased his fear of the trailer.  Thankfully, no one (including him) was every seriously injured while trailering (although I did get my fare share of bruises and rope burns).  This trailering problem eventually caused me to stop going to barrel races because getting him in the trailer was such a hassle and very stressful.

This was taken before Zeke became fearful of the little trailer!
Now, I have a larger trailer that is much less claustrophobic for the horses, but his fear of trailers still remains.  So, I am retraining him to load without having to rely on ropes or other people to get the job done.  I am working to make him load calmly and consistently, without using fear or aggressive methods.  The next several posts will lay out the step-by-step process to retrain a horse to trailer (or give a new horse a positive trailer experience), as well as show how it worked for Zeke.

**Working with fearful horses can be extremely dangerous, especially in the confines of a trailer.  Inexperienced horse owners should seek help from a professional.  Always put your safety first!


Training Horse Profile: Wrigley the Mustang

  Training Goals: Start under saddle Continue to build confidence and trust Wrigley is a four-year-old mustang that was recently acquired by...