Thursday, June 4, 2020

Training Horse Profile: Flicka #2

Training Goals:
  • Picking up feet
  • Trailer loading
  • More comfortable with regular activities
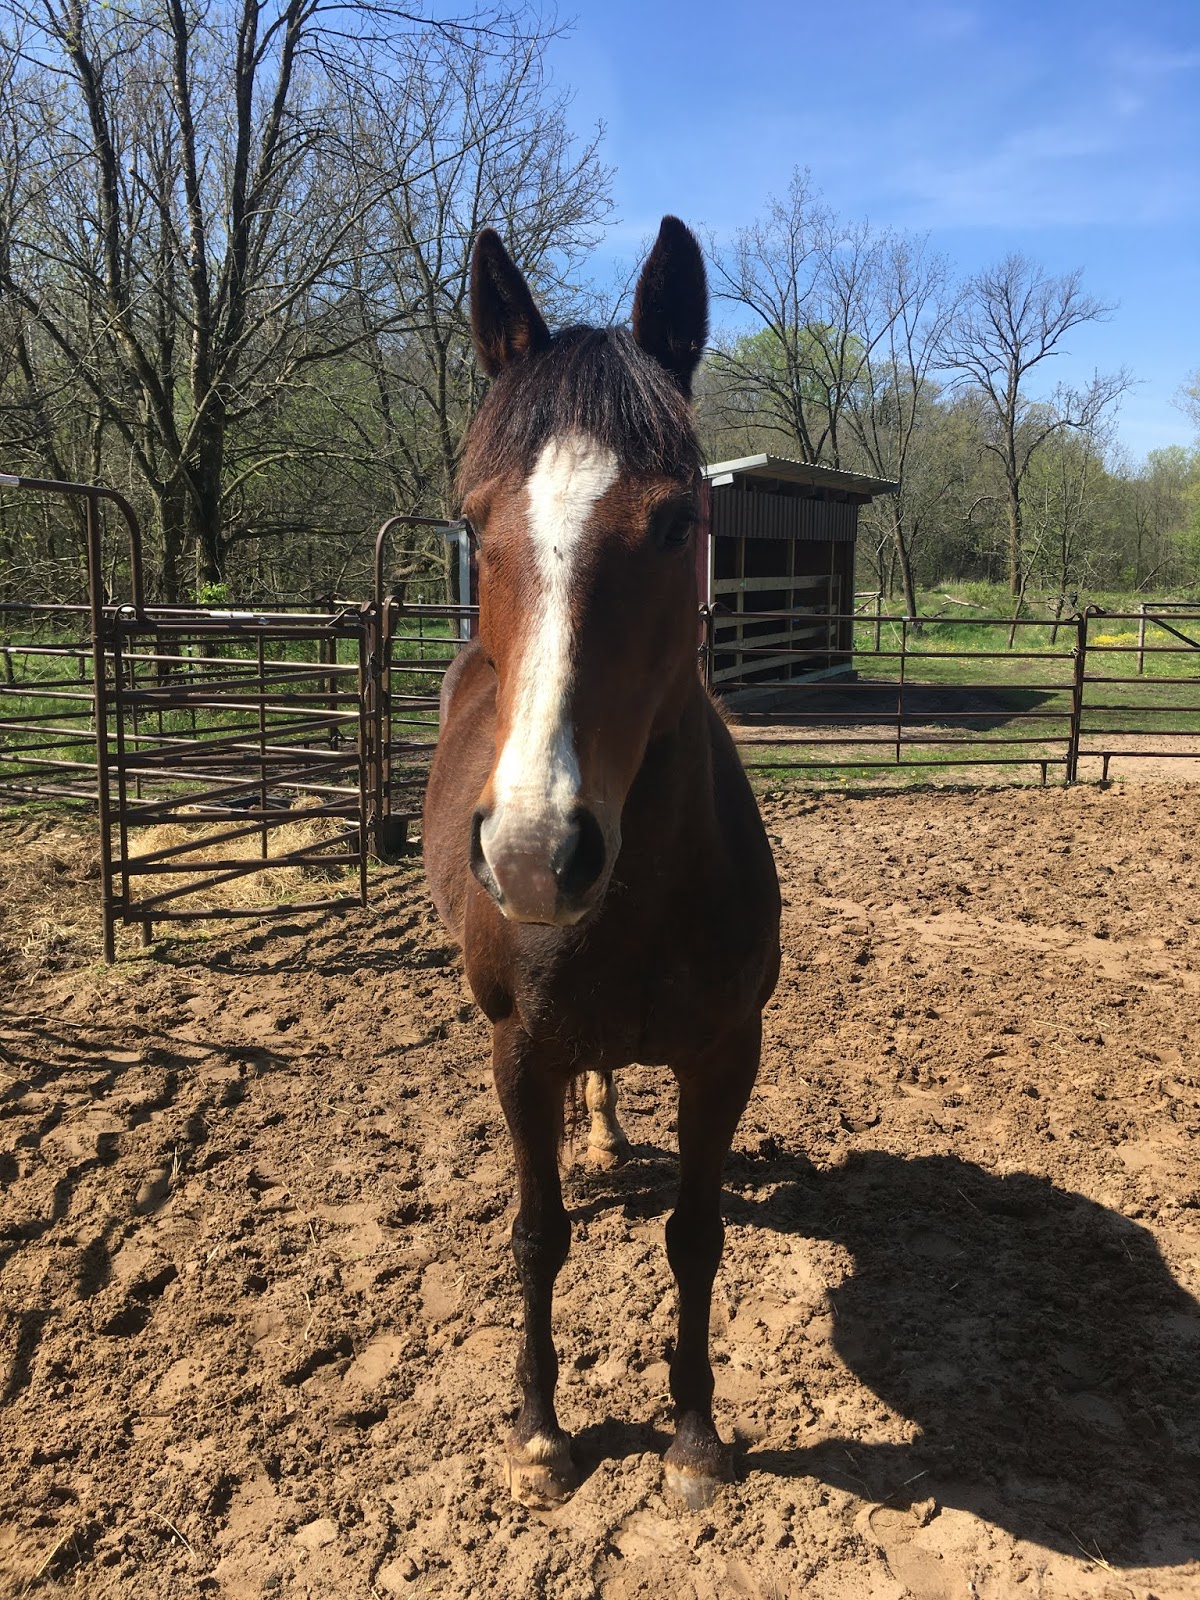
Meet Flicka!
Flicka must be a popular name for bay mares, as this is the second one I have had for training 😊  This Flicka is approximately 10 years old.  Her owner has had her since she was a year old.  She had been sitting for a few years and developed some behavioral issues that the owner wanted to address.  Most of her behavioral issues stemmed from her resistance to submit to the handler and instead trying to assert her dominance. A video from a particularly challenging day:

Behavioral Issues:
  • Invades handler's space
  • Often kicks or rears when trying to work with her feet.  Issues with farrier.
  • Pulling back when tied.
  • Rearing on the lead line. Resists forward pressure.
  • Bites when she doesn't want to do something.
  • Kicks when you ask her to move her hindquarters away.
  • Tries to bite when saddling.  Also may rear, strike, etc.
  • Sometimes rears when riding.
  • Trailer loading issues
This was a lot of issues to tackle in a relatively short amount of time but she made great progress in a lot of areas.

The owner remarked when he visited her the first time that she seemed like a different horse and "sleepy".  That's exactly what we want to see: a calm and relaxed horse!  We shouldn't have to fear being bitten, kicked, or run over when we turn our backs to the horse.

So, lets tackle some of these behavioral issues and what worked for her:

Invading the Handler's Space

Flicka had a serious problem with invading the handler's space, often dangerously so.  She pushed back if you tried to move her shoulder away and would kick out if you asked her to move her hip away. While leading, she would nip and sometimes would practically run you over.  Teaching her to yield her forehand and hindquarters really helped her to respect my space.  By the end of the 30 days, she was very responsive to cues to yield both her forehand and hindquarters and no longer tried to nip at me.

This is one of the most common problems I see with horses that are well loved by their owners.  We want our horses to be close to us and love on us!  The problem with allowing our horses to invade our space and push us around is that it creates behaviors that can quickly become very dangerous in situations where the horse is stressed or nervous, or gets spooked.  While Flicka really improved in this area, it is something that her owner will have to continue to reinforce to keep her respect.


It took four days to get her to walk across the bridge.
Feet Issues

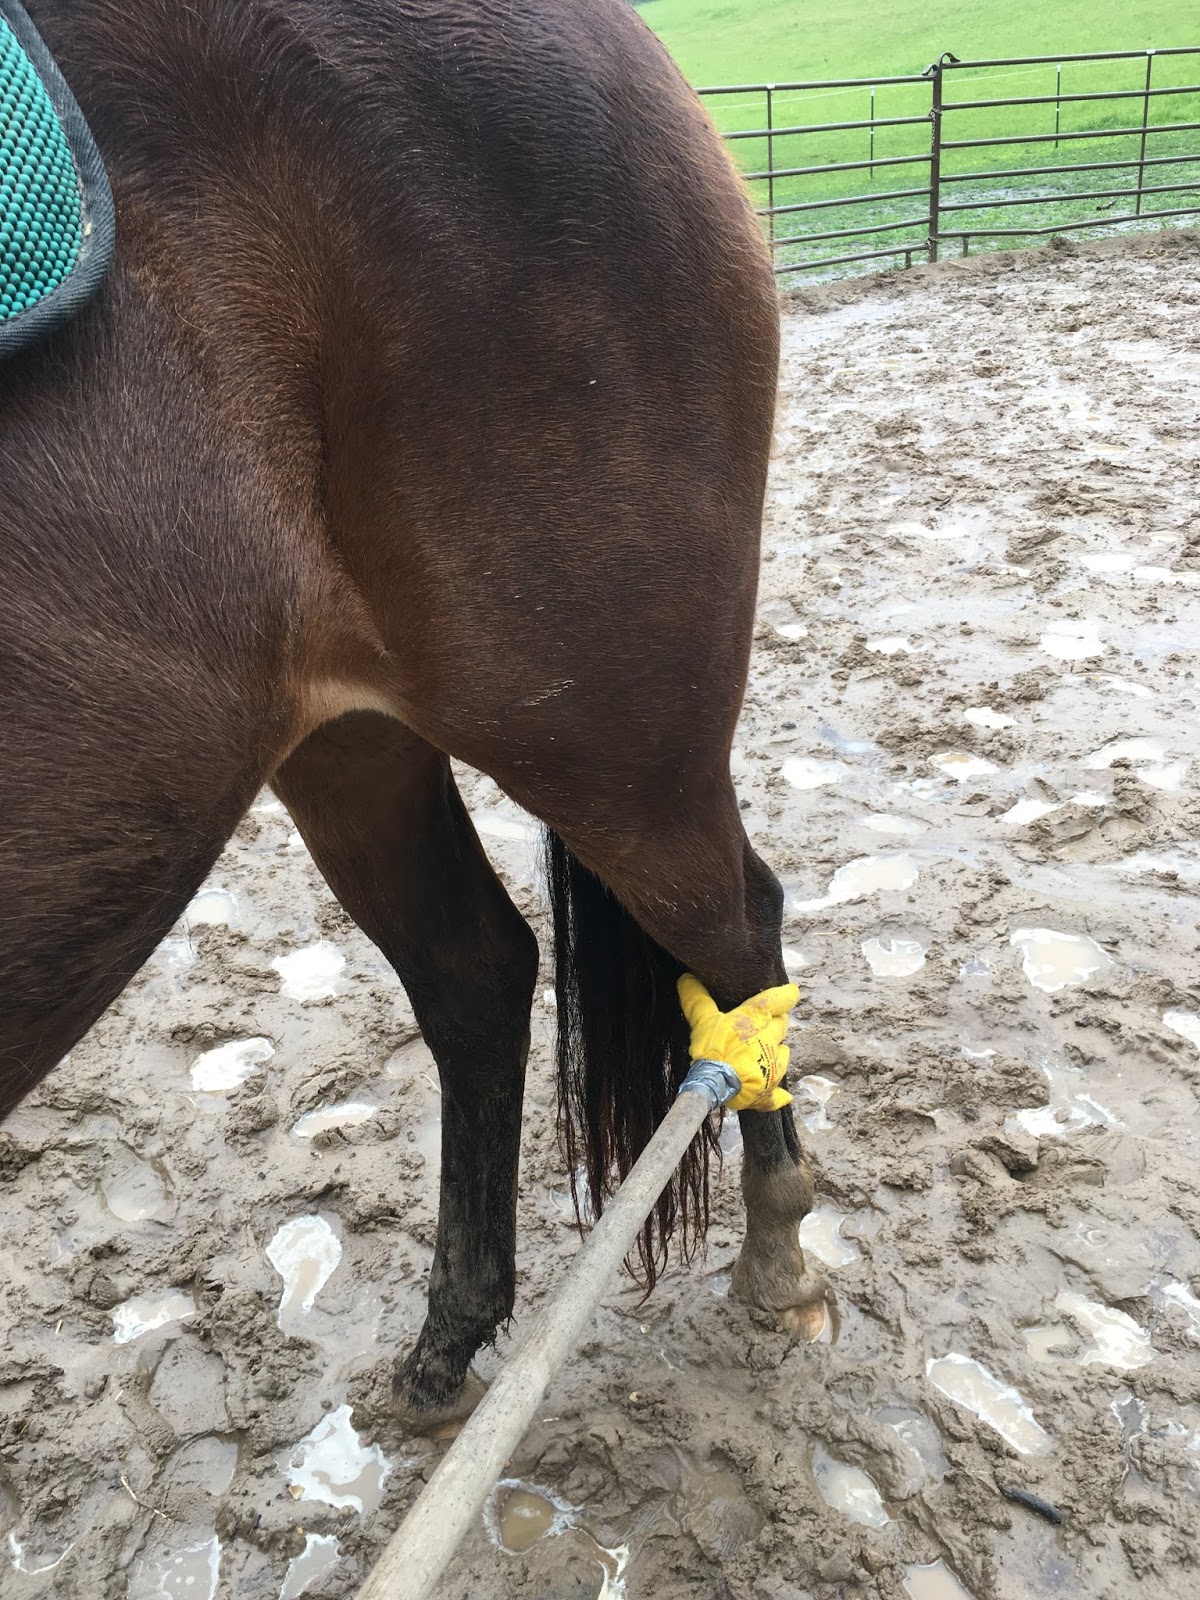
Her owner was having difficulty picking up her feet without her rearing up or kicking.  Getting her feet trimmed was a huge hassle, sometimes even requiring the use of sedatives to get the job done. She made great strides with standing quietly while her front feet were lifted.  Her hind feet were harder to work with because she sometimes would kick, especially on the right side.  To keep myself safe, I started working with her hind legs using a dummy hand.  Once she was comfortable with that, I used a soft rope around her ankle to ask her to lift her leg while I stood at her shoulder (similar to a Scotch Hobble, but I do not tie the leg up).  This really helped her to get better at lifting the leg without kicking.


Using the Dummy Hand
Pulling Back When Tied/ Halter Pressure Resistance

Flicka has a history of pulling back and breaking halters and lead ropes.  A few times she has hurt herself in the process and, understandably, being tied up produces anxiety in her.  The fact that she pulls back is not super surprising as she is very resistant to halter pressure when leading and too much pressure causes her to back up or rear.  She has not learned to give to the halter pressure.

Old school method of correcting this problem is to tie the horse to something secure and let them tug and fight until they give up.  The idea is that they will eventually learn that they can't get away and the easiest thing to do is to stand there.  While this can work for some horses, but other horses won't give up and the result is an injured (or in worst-case scenario, dead) horse.  The "blocker tie ring" was developed for those exact reasons.  Teaching the horse to come towards the pressure is the first step in solving this issue safely.

While leading, if she backs away from the forward pressure of the halter or rears, I send her out and work her in a circle before applying forward pressure again.  This also works if the horse simply refuses to move.  By applying pressure on their hindquarters, they are unable to remain frozen or move backward and after some repetition, they will start to get the idea of coming forward to release the pressure on the poll.

Over the 30-days, she became less resistant to halter pressure, and her first instinct was no longer to rear or back up most of the time.  Continued practice with slow-release tying (such as using the blocker tie ring) will help her to build confidence about being tied.

Biting

When I first started working with her, I never took my eye off her or turned my back.  She would bite while haltering, leading, picking up feet, saddling, etc.  Biting is one vice I do not tolerate.  The key here is to make an immediate consequence, and then continue on with what you are doing.  A very effective deterrent is an elbow to the nose while she is in the process of trying to bite.  By the third week she rarely tried to bite me anymore.

Ground Driving
Hindquarters

If you asked her to move her hindquarters she would push into you and sometimes try to kick.  To work on this issue, I use the handle end of a lunge whip as an extension of my arm to apply the pressure on the hip.  This gives me a few extra feet and allows me to stay in a safer position.  After she was doing well while using the whip, I could use my hand, and kicking was no longer an issue.

Saddling Issues

I expect horses to stand while they are being saddled, regardless of whether they are tied.  Flicka would stand okay when putting on the pad and saddle, but as soon as you were ready for the girth she would try to run away.  If you stopped her forward movement, she would rear.  Try to grab the girth and watch out for those teeth!  I did an experiment by using a rope around her girth area and applying tightening pressure that way.  Interestingly, she stood still for that and had almost no response to the rope, even though I was cinching it just as tight as the saddle.  So, her reactions really weren't about the cinch, she just didn't want to be saddled.  

To fix this, any time she want to move while I was saddling, I made her work.  Lunge her for a couple of minutes and then try saddling again.  After a couple days of this, she figured it was just easier to stand there and get saddled.  She still would give me "the look" while cinching, but she didn't dare try to bite!


Round Penning- Great Respect Building Exercise
Trailer

When Flicka arrived, she had only been on a trailer twice in her life: once as a baby, and to bring her to me.  I suggested that her owner put her food and water on the trailer, and when she got in to eat, he shut the door and brought her to me.  Feeding on the trailer is one of my favorite ways to get horses comfortable with trailers (read more, here) but once she was here she wouldn't get on the trailer to eat her food.  After a few days, we had to move on to plan B.  First she would lead up the the trailer and stop when she couldn't move forward any further without stepping up.  We built a bridge to simulate the height of stepping into the trailer for her to get comfortable with.  At first, she would just jump OVER the bridge, but after four days of work, she crossed over in any direction without any hesitation.

Back to the trailer, now that we knew she was confident in stepping up, we knew she could do the trailer.  Any further pressure on the halter would cause her to back away, but having a second person behind tapping a whip on the ground was very effective motivation for her to get on the trailer.  As the days went by, she needed less and less motivation from behind to get into the trailer.

At first she had a habit of backing out very quickly and sometimes throwing her head up (hit her head a couple of times).  Repetition helped her to relax about backing up and not rush out.

Trying to entice her with food!
Flicka learned that she could eat if she was in the trailer!


Ways to Show Your Horse Leadership

A large cause of most of her issues is the lack of trust in human leadership.  She wanted to be dominant and a lot of her behaviors were her asserting that dominance.  By regaining personal space for the handler and cultivating respect, a lot of her problems went away.  Ways to regain your horse's respect:
  • Maintain your personal space.  YOU move the horse, the horse doesn't move you.
  • Teach the horse to yield the forehand, hindquarters, and back up.  The better they are at this, the more respectful they are of your space AND the easier it is to move them out of your space.
  • Try round penning.  It is a great way to exercise your horse, teach them to respond to your body language, and reinforce your leadership.  You tell the horse when to switch directions and use your body presence to enforce it.
  • Try obstacles! Bridges, tarps, water, jumps, etc. can be a great way to build trust with your horse.  As a bonus, the more your horse is exposed to, the more confident they will be in new situations.

Monday, May 18, 2020

Training Tip: The Dummy Hand

Do you have a horse that is overly sensitive to touch?  Maybe just touching certain areas causes them to bolt or kick.  A dummy hand is a safer way to desensitize these types of horses while keeping the handler in a safer position.  Dummy hands can be especially useful for desensitizing the hindquarters and hind legs.

Making one is super simple, and you probably already have all of the materials!  Here's how to do it:

MATERIALS:
  • Sturdy pole, like a broom handle
  • Glove
  • Plastic bags
  • Ductape

PUTTING IT TOGETHER:

Stuff the plastic bags into the glove.  Make sure to get the bags into the finger tips.  Keep stuffing the glove until it is stiff.  Tape the glove securely onto one end of the broom handle.  That's it! Your dummy hand is complete.

HOW TO USE IT:

Allow your horse to sniff the dummy hand first.  Then, stroke your horse with the dummy hand on a spot they are comfortable with (typically the shoulder is a good place to start).  Hold on to your horse's lead rope as you work, but allow some slack in the lead.  Make sure your lead is short enough, however, that they are not able to swing their hindquarters towards you to kick.  Gradually move across their body to new areas, stroking until they are relaxed and comfortable.  Make sure to use the dummy hand on both sides!


Thursday, January 16, 2020

**EARLY BIRD SPECIAL**

Book your training dates by April 15th and save $50 on 30 days of training!  A non-refundable deposit* must be received by this date to reserve your horse's training spot and to receive the discount.

**Now booking for 2020.  First available date is May 2nd**

Services include:

*Colt Starting

*Behavioral Correction

*Tune-Ups

*Pattern Starting (Poles, Barrels, etc.)

*Trail Training (Crossing water and bridges, traffic desensitization, etc.)

Training packages are available in 30-day increments (a shorter duration may be available depending on the service requested) and includes feed and board.  Fee is typically $625 for 30-days.  Potential clients are welcome to see where their horse will be staying and meet me in person before bringing their horse to me, if they wish.  Ask about my discounts for having more that one horse in training at a time.


If your horse is feeling spunky, book a spring tune-up!
*The non-refundable deposit is $50 for 30-days, and $75 for 60-days.  If the original date reserved does not work, a different date may be scheduled (provided I have an opening).  If I am unable to take your horse due to unforeseen circumstances on the agreed upon date and an alternate date cannot be arranged, the deposit will be refunded.

Saturday, November 2, 2019

Training Horse Profile: Flicka (Part 2)

Training Goals:
  • Picking up hind feet
  • Walk, trot, canter
  • Turning, stopping, backing
(If you missed Part 1 of Flicka's training, you can find it here.)


Day 17: Flicka's first ride!  She did pretty well and walked quietly around the round pen.  It's always nice when they don't turn into a bronc.  She definitely wasn't 100% comfortable with a rider on her back and she immediately stopped if I shifted my weight or made any noise.  I also started working with her on picking up her hind feet.

The first step to teach an adult horse to pick up their rear feet is to get them comfortable with you being back there.  I start by making sure they are comfortable with their hindquarters being touched and with someone walking behind them.  Then, I begin handling their lower legs.  I want the horse comfortable with me running my hands down their legs and feeling their hooves.  If the horse is not comfortable with me touching their legs, they won't be comfortable with me holding one of their defense mechanisms.  Next, I apply pressure just above the fetlock to ask the horse to pick up their foot.  As soon as they lift their foot, I release the pressure.  Once they are proficient about picking up their foot quickly when asked, I can work toward teaching them to keep the foot up and allow it to be held.

Day 18:  Her 2nd ride was uneventful as well.  I worked with her on maintaining her walk and introduced turning.  Turning at the walk was pretty easy for her, as she had lots of practice with that while ground driving.

She has difficulty standing in place when I ask her to pick up a hind foot.  It is pretty common for horses to try and avoid picking up hind feet by moving their hindquarters away from you.  This movement can be prevented by having the horse stand along side a fence.  It is helpful (and safer) to have a second person hold the horse for you.  If you do not have a second person, the inside corner of a sturdy fence can also be used.  

Day 19: Today, I introduced trotting.  Based on early body language, she did exactly what I expected her to do and bolted after a couple of strides of trot.  Trotting created more movement on her back and the saddle makes more noise as well, and she spooked.  Thankfully, she was easy to get back under control.  I asked her to do short sequences of trotting until she could go a few strides without bolting.  Continued training with pressure and release to pick up hind feet.

Day 20-22: The next couple of days we did a lot of walking, circles/turns at the walk, trotting, transitions, and I introduced her to backing under saddle.  She picked this up very quickly and responds quite well when asked to back up.  She is picking up her hind legs pretty consistently when asked, so I have begun to teach her to let me hold her hoof.  Right now, I only hold it for a couple seconds and I try to place it back down before she thinks about pulling her foot away.


Day 23: She is consistently picking up the trot and maintaining the trot both directions in a circle, so I introduced turning at the trot.  As is completely normal at this stage, Flicka breaks down to a walk or stop when I ask for a turn.  This was one of those days when the trainer gets more of a workout than the horse!  Her hind feet are coming along slowly.  Sometimes she picks it up quickly and I can hold it up for a few seconds, other times it doesn't go as well.

Day 24: A lot of exercise for the trainer again today!  She is maintaining the trot through some of the turns, so some improvement, but I sure am tired out from all the effort it took to get her there.

Day 25: Flicka's owners visited to see how her training was coming along.  She showed them how well she stands to be saddled, how she lunges and leads, she picked up both of her front feet beautifully, and quietly stood tied.  I am very proud of how she behaved under pressure!

Day 26: Flicka's turning at the trot has really improved!  She is maintaining her trot through the turns and I don't have to constantly keep after her to stay trotting.  She had trouble backing up today, which is uncharacteristic for her as she is usually very responsive to backing (she later came up lame, so it was likely due to pain when she put extra weight on her hindquarters to back up).

Day 27:  I was really excited to continue today after yesterday's great session.  Unfortunately, just as we were starting to make great progress at maintaining the trot through turns, Flicka came up lame.  As soon as I started working with her, I could see that she was feeling sore in the right hind leg.  Upon inspecting her leg, my suspicion was confirmed when I located swelling at and above the right hind fetlock.  Bummer!  She likely stepped wrong during the previous day's session and strained the tendons her fetlock.  This type of injury typically heals up just fine after some rest.  Flicka's owner decided to take her home to heal up and give her enough time off to ensure that she was 100% before continuing her training.
  

Friday, September 6, 2019

Training Horse Profile: Flicka (Part 1)

Training Goals:
  • Leading
  • Tying
  • Saddling
Things I work on every day:
  • Grooming: This helps the horse get used to being touched and handled, as well as provides relaxing bonding time.
  • Picking up Feet: This is a skill that takes time for most horses to master.  Picking up their feet daily can help make it a routine activity for the horse.  When teaching this, I try to only give the foot back when they are standing quietly.  In the beginning, this may only be a second or two, but the time can be gradually increased.
  • Round Penning: This is a great way to warm up the horse's muscles and get them mentally prepared to begin learning.  Lots of directional changes, speed changes, and halts makes this exercise more beneficial for the horse and prevents it from becoming mind-numbing circles.  It is a great time to work on vocal cues, which are helpful for later training under saddle, and builds respect and trust.
  • Tying: I tie training horses up after sessions to get accustomed to being tied and help them build patience.  If time allows, tying before AND after training sessions is very beneficial to the horse and can help break buddy sourness and barn sourness.
    • To begin, I 'tie' by wrapping the rope around the round pen panel a couple of times.  This gives tension on the rope if she tries to move away but if she panics it will slowly let out rope.  This prevents the horse from hurting themselves from pulling back when they are still learning how to give to pressure.  Once the horse is good with wrap-tying, I start tying them up in the stall after I work them.  I always use a quick release knot just in case.  I do not hard tie to the round pen panels because they are not strong enough if the horse pulls back hard.
Flicka is a 9 year old Quarter Horse mare, with no previous training.  The owner has worked with her on standing to be haltered and allowing people to pet her.  She has not been taught anything else, so I have a lot of work ahead of me!

We backed the trailer up to the round pen gate so that we could unload her right into the enclosed arena.  That way I could start working with her on leading in a safe and controlled area and I didn't have to worry about trying to get her back and forth from the stall to the round pen when she doesn't know how to lead!  I have two small pens attached to the round pen for this reason.  I can chase horses into the stalls if they don't want to be caught, or if they don't yet have leading skills.


Day 1: My first task is to teach Flicka to lead.  It is difficult to move horses from pastures to stalls to arenas if they can't lead.  Plus, all future training is easier to accomplish when the horse has good ground manners.

Flicka's first instinct when she doesn't understand something or when she gets upset by pressure is to throw her head up and back away.  When forward pressure was applied on the lead rope, she threw her head up and backed quickly away.  Some horses are quick to realize that if they come to the pressure, it goes away.  But for Flicka, more pressure on the halter just made her pull back harder. Playing tug-of-war with a horse is not very effective and the horse always wins!  

To help her to understand what I am asking, I begin by asking her to move her hindquarters away from me.  This introduces pressure on the side of her nose and jaw.  To get her to move her hindquarters away, I walk towards her hip and give pressure by swinging the end of the lead rope.  I keep her nose turned toward me so that it is less likely that she can kick me and it makes it a natural response to step her hindquarters away.  At first, I am looking for basically a forehand pivot (front feet are mostly stationary and the hindquarters move in a circle around them).  As the horse begins to understand the concept, I start to lead off from the pivot.  I usually can get a few steps before the horse realizes the pressure change and stops.  Then I go right back to pivots.

I also introduced her to lunging.  She really struggled with going forward and too much pressure caused her to bolt and take off.  I decided to try lunging another day and we switched to round penning.

Day 2: After the challenging day yesterday, I was pleasantly surprised when she practically starting leading right from the start.  If there was too much pressure on the lead, I'd have to go back to moving her hindquarters to get her moving forward again.  

Tried again at lunging.  This time I put a rope halter on her.  This helped a lot in keeping her from bolting off and I was able to get her to start moving off in a circle.  

I also started working with her on picking up her front feet.  It is so much more challenging to teach an adult horse, weighing upwards of 1,000 lbs, how to pick up their feet and hold them up!  Flicka was not thrilled with this and did all the behaviors that are much easier to handle when they're babies: pulling foot away, leaning into me, backing away, hopping on three legs, etc.  


Day 3: After warming up with leading and lunging, I introduced Flicka to the saddle pad!  She did  really well with this.  I always begin by letting the horse sniff the blanket and then rubbing it on their shoulder and back.  If they are good with that, then I start laying it over the back.  I threw it on her from both sides, on her butt, up on her neck, she was completely fine with it.  Another one of the horses in training injured my back and doing heavy lifting is off limits right now, so I have to take a break from working on picking up her feet.

Day 4:  Introduced her to the saddle and bridle!  She was fine with the saddle, but was a little unsure about it when I cinched it up.  I always do this step while holding the lead rope, not tied up, in cause the horse panics.  She backed up when tightening it up but otherwise no issues.  She took the bit pretty good as well.  Lunged her to help her get accustomed to the feel of the saddle and girth.  No bucking and she seemed pretty comfortable with it.

Day 5: Started with lunging with the saddle and bridle.  Then I hooked up the long lines for ground driving to  begin to teach her about bit pressure.  Right away she turned pretty good but panicked when pressure was placed on both reins.  She bolted a few times

Day 6-10:  Continued to work with her on ground driving, improving her turning, and working on stopping without panicking.  I also began to desensitize her to mounting.  I desensitize on both side by slapping the saddle and pad, shaking the saddle, flopping the stirrups against her sides, putting pressure down on the stirrup.  This is to get her ready for her first ride.  I don't want to swing into the saddle and have her spook because the saddle is making noise, or the stirrups are bumping her sides, jumping next to her.  I want her used to a lot of activity on her back.

Day 11: She has really improved in her ground driving.  She will now stop AND back up WITHOUT panicking!  This is one of the skills I want before I get in the saddle.  I want the horse to know how to stop and stand still.  Now that she is fine with me jumping next to her and lots of saddle noise, I start putting my foot in the stirrup and bouncing.  This puts weight onto her back and prepares them for mounting.  She was not comfortable with this.


Day 12:  Ground driving great with back, halt, and turning.  Continued work on foot in stirrup.  She backs up and looks to run away.

Day 13: Slight improvement with mounting practice!  I was able to put foot in stirrup with some weight.  My lower back injury has healed up so we are back to working on picking up her feet.

Day 14 & 15: Mounting practice and feet pick up.  I am getting a lot of exercise bouncing next to her with one foot in the stirrup!  I am definitely more sweaty than she is when we are finished for the day.

Day 16:  I was finally able to stand in the stirrup!  She stood calmly  while I stood in the stirrup over her back.  I was beginning to think she was never going to accept this step, so this is a huge relief.  I know that now she is mentally ready for her first ride.  She also picked up both of her front feet without trying to pull them away!  This was a great day!

Stay tuned for my next post where we will see how Flicka does with riding!


Tuesday, July 23, 2019

Training Horse Profile: Milo the Mule

Training Goals:
  • General tune-up
    • mounting/dismounting from offside
    • ride with spurs, britchen, and rear cinch
  • Improve response to bit pressure (turning, stopping, backing)
Milo
My grandfather has had various mule teams over the years, all of which were trained for driving.  Some of the teams have pulled his covered wagon during the annual wagon train, while others he put to work on the farm raking hay or other field work.  I always loved to ride along when he hitched up the team.  Milo was my first experience with a riding mule.  The main difference I found between horses and mules was that they are much stronger and pretty quick on their feet.  This guy could do a 180 turn before I could even blink.

The first day was spent doing one of my favorite exercises: round penning.  I love to start with this exercise because it forms a working relationship and begins to build trust between me and the horse.  With this exercise, I establish vocal cues, body language, and the horse starts to learn to look to me for directions.  I find that starting with round penning and other ground exercises helps the horse to respond more successfully when I move to riding.  Milo caught on to this exercise fairly quickly.

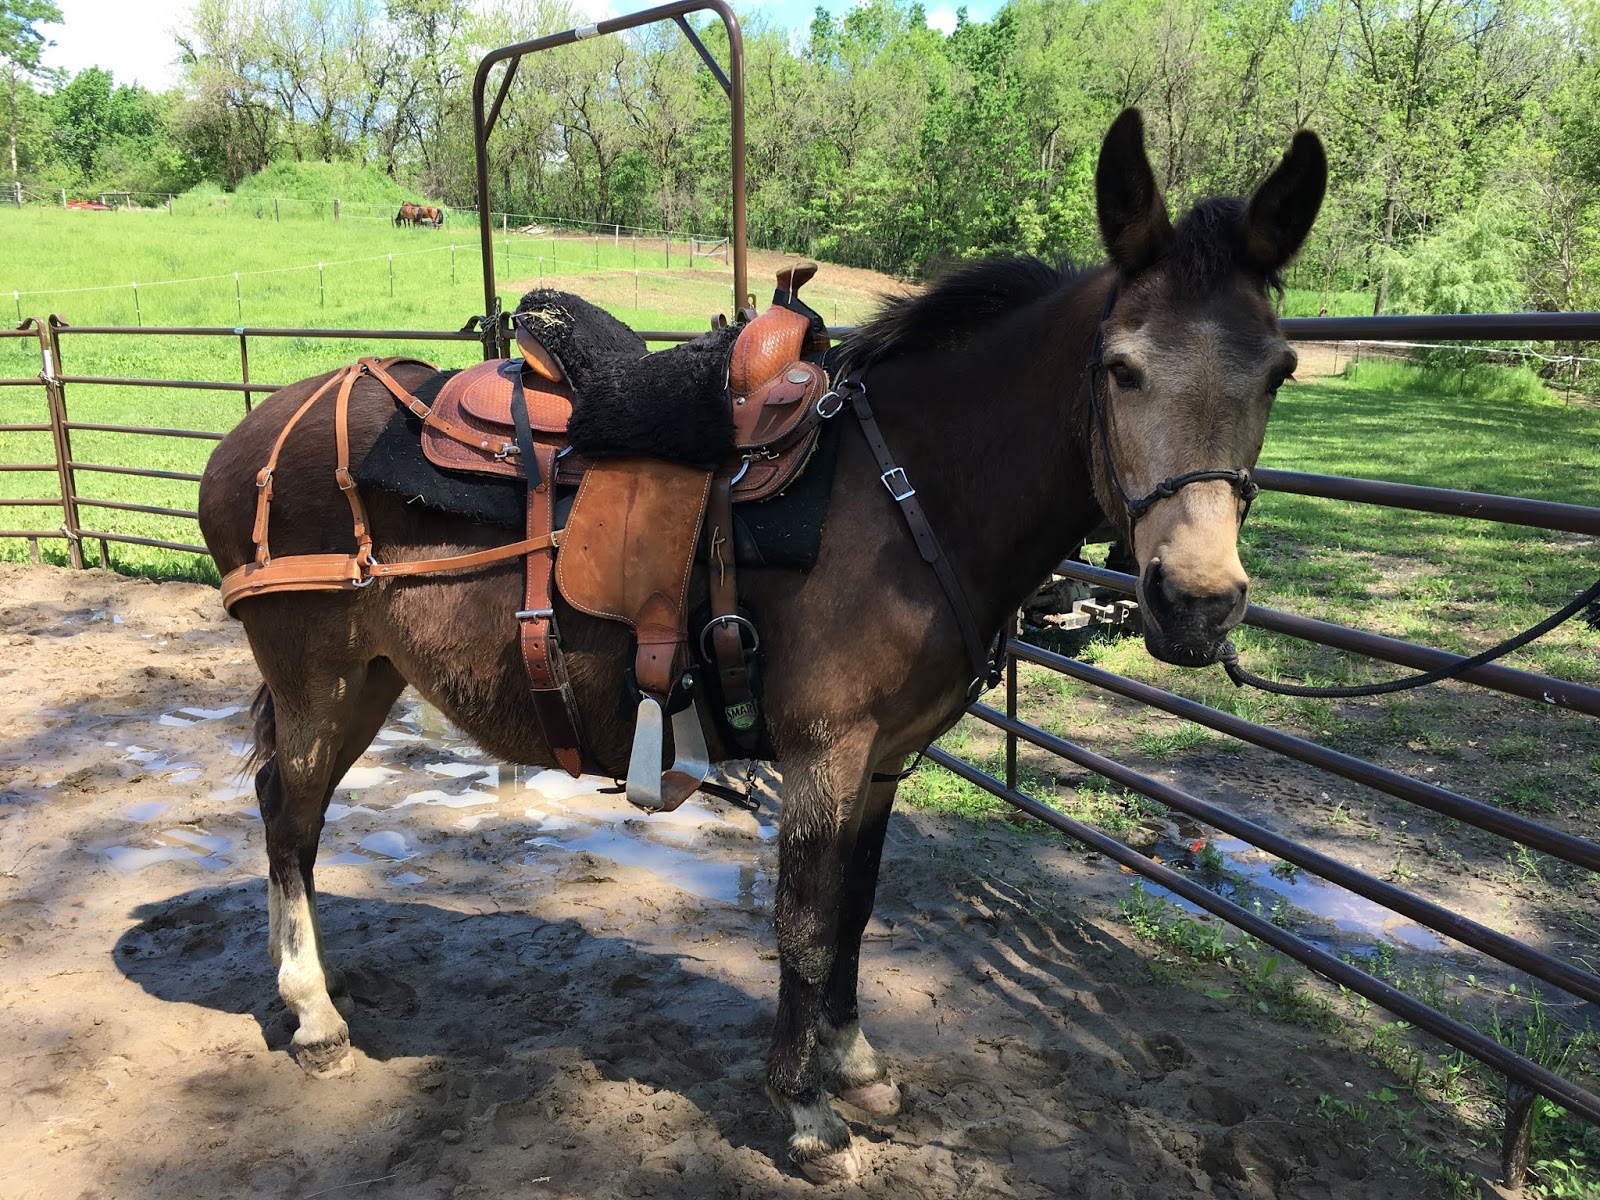
Milo with the rear cinch, breast collar, and britchen.
One of the main concerns Milo's owner had was controlling him under saddle.  On the ground he listened fairly well, but under saddle he tended to have a mind of his own.  I spent the remainder of the week working on turning.  At first, he was very resistant to any bit pressure.  If I tightened the left rein, he stuck his nose in the air and ran right, and vise versa.  I had to work on this for a few days before he really started to give to the pressure.

Next, I worked with him on trotting.  He much preferred to walk and it took a lot of energy and encouragement to keep him going.  I think I got more exercise than him!  After okaying it with the owner, I started riding him in spurs.  This helped immensely and made trotting much more enjoyable for both of us.  He struggled with turning at the trot but improved as we continued to work at it.

Milo was glad to be done for the day!
The final thing I worked on in relation to the bit was backing up.  A horse that backs well is usually quick to respond to bit pressure when asked to stop or turn.  Milo was very resistant to backing up, which was not surprising.  The longer the pressure was held, the harder he pushed against it.  To help him understand what I wanted, I switched to working on it from the ground.  Milo understood how to back up from halter pressure, so I combined the two.  While standing next to him, I asked him to back up using equal pressure on the reins.  I waited a few seconds to give him the chance to respond, and then added halter pressure.  Pressure from both the reins and the halter was released when he took a step back.  Eventually, he learned to back up from the bit pressure alone.  Interestingly, though he backed up off of bit pressure easily on the ground, he still resisted it from the saddle.  This got better with continued practice, but he tended to respond much slower under saddle than from the ground.

Now that Milo was easily controlled in a contained environment, I wanted to see how he would do outside of the round pen.  I started in the large pasture and he listened very well.  He turned, stopped, sped up and slowed down when I asked him.  I also took him out on the trails.  I was impressed that he crossed the bridge, stream, and swampy areas without hesitation.  The first time, things were going well until he decided that he was too far away from his friends (thanks to the mare for neighing loudly).  One minute we were walking calmly down the trail and the next minute I was on the ground and he was headed home without me.  I stayed very aware of his body language for the rest of our rides on the trails!  

Milo was definitely most comfortable staying where he could see the other horses.  When he could see them, he was obedient and calm.  When he could no longer see them, he became quite a handful to ride.  This is not uncommon.  Buddy sourness is one of the biggest frustrations horse owners have.  This is not surprising as horses are herd animal and would much rather stay with their friends!  Typically, buddy sour horses that are a handful on their own are perfectly happy going out on the trails in a group, and Milo likely would too.  Milo improved a lot during his 30 days, and with continued time in the saddle he will be an excellent trail mount.


Tuesday, May 21, 2019

Trailer Training: Step 3

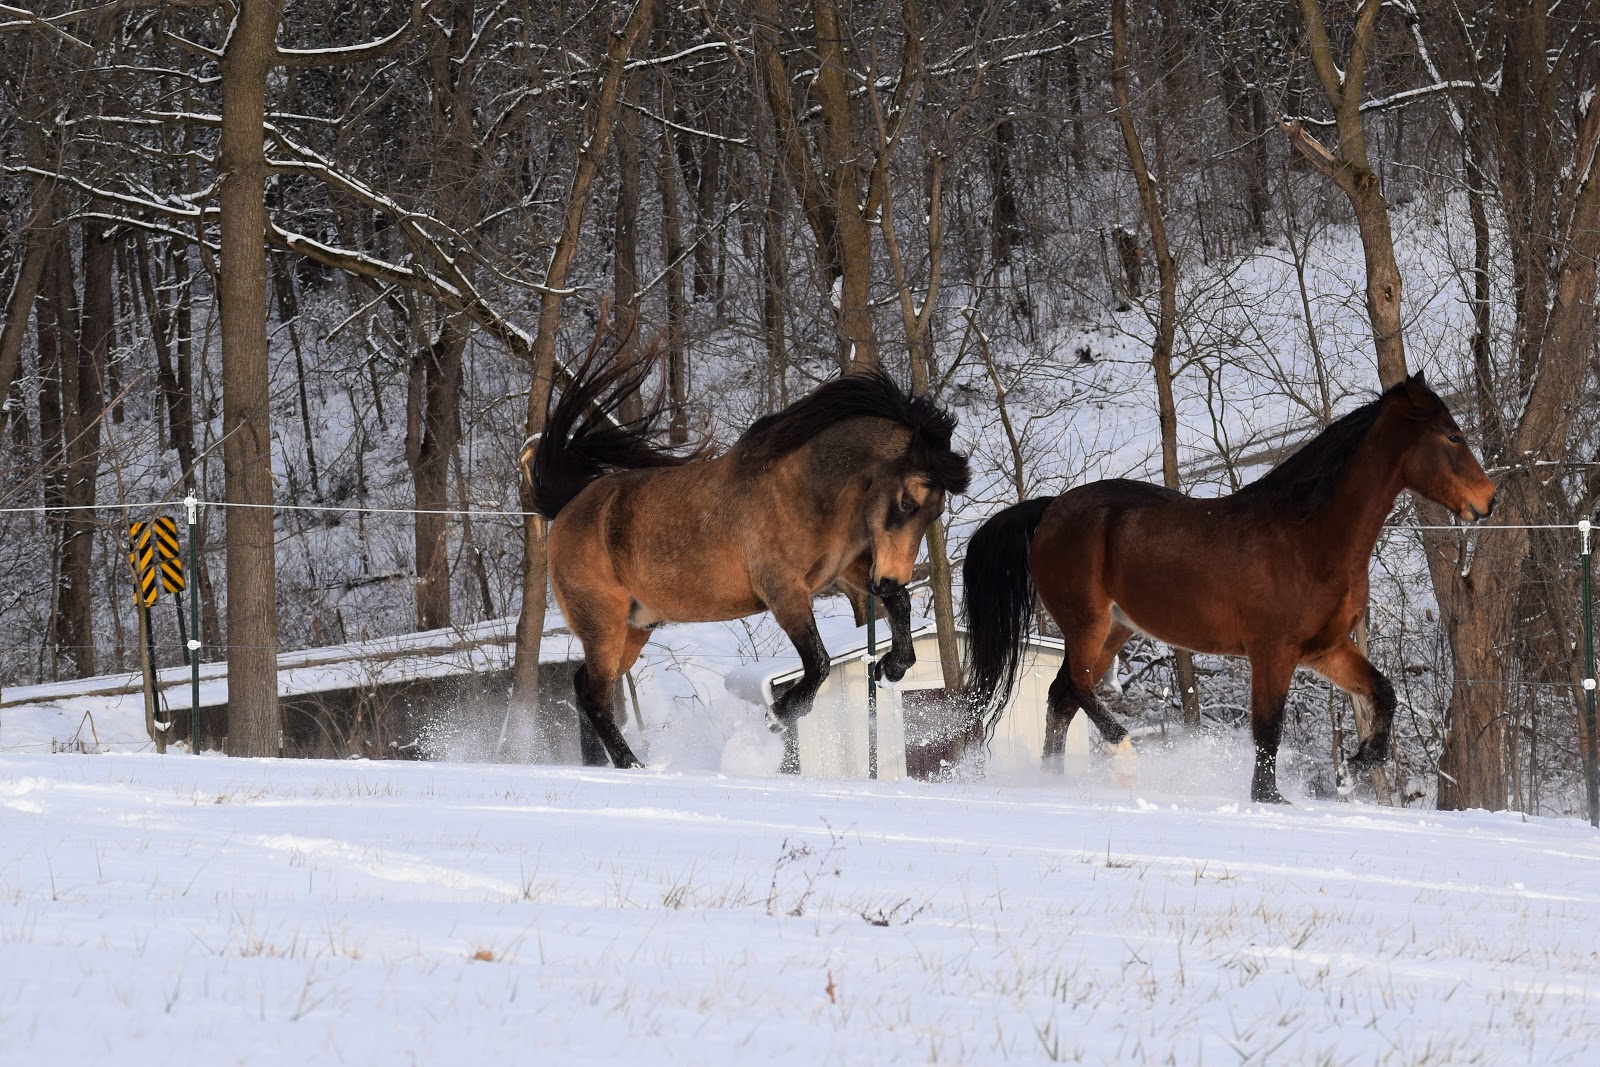
The boys enjoyed the snow this winter!
Life has been busy, so I haven’t been working with Zeke and the trailer in quite awhile.  The good news is that he has remembered our previous sessions and after a one day review of Step 2, we were able to move to Step 3.  I say this because you don’t need to consecutively work on trailer training from start to finish.  You can start it, take a break, and come back to it later.  The horse will remember the previous sessions and after a short review, you will be able to move forward.  Taking a break won’t send you back to square 1, as long as you continue to build upon positive experiences with the trailer.

At this point, Zeke is very comfortable loading in and out of the trailer.  I can load him both by leading him in and by standing at the back of the trailer and sending him in.  I can tell that he is much more relaxed with the trailer for a couple of reasons:
  • I can ask him to back up to the door, stop, and then step back forward.  Previously, once he started backing up, any forward pressure would result in him backing faster to get out. 
  • He does not hesitate to load.
  • I have to make him leave the trailer instead of him quickly wanting to leave it. 
  • If I load him and remain outside, he will wait until I ask him to come out instead of rushing out and blowing past me. 
  • He no longer tries to run away from the trailer when we approach it.
While he has improved immensely, he is still afraid of being locked in the trailer.  He doesn’t want to be confined to the small dark space.  The open door allows him to relax.  Obviously, I cannot travel down the road with the door open, so I need to help him get comfortable with the door shut.  To do this, I will lock him in the trailer for increasing amounts of time.  At this time I am not locking him between partitions or tying him up.  He has 2/3's of the trailer to move freely about.  I also have a hay bag with tasty hay for him to munch on and a feed pan on the floor with a little bit of grain.

What You Need:

  • Horse Trailer: The trailer should be parked in a safe location and secured so that it can not move.  At this point, you should be able to load your horse outside of an enclosed area.
  • Halter and Lead:  I love the control that a rope halter offers, especially for horses that try to turn away from the trailer.  However, I do not tie horses up in a trailer with a rope halter because it can seriously cut into the horse’s skin if the horse panics or an accident occurs.  At this point, I transition the horse to loading in a nylon halter.  While I am not going to tie the horse up in this step, I want him to load regardless of the halter I am using.
  • Food Reward: The trailer should be stocked with tasty hay (either on the floor or in a hay bag).  A small amount of grain can be used during this step as well.

The Steps:

Step 1: To begin, load the horse into the trailer by leading him in and asking him to back out.  This is really a review of Trailer Training Step 2.  Do this a couple of times until the horse is relaxed and obedient.

Step 2: Next, load the horse into the trailer by sending him in while you remain outside of the trailer.  There are some instances where you may need to load your horse without leading him in and this helps him to become comfortable with this.  If the horse turns around to exit the trailer, make sure to make him wait at the door until you tell him to come out.

Step 3: Place a small amount of grain at the front of the trailer.  I like to use a rubber feed pan on the floor.

Step 4: Send the horse into the trailer like you did in Step 2, and close the door behind him.  The lead rope should be taken off so that it does not catch on something or get wrapped around their legs.  It is normal for the horse to move around and make noise.

Step 5: While you wait outside, be sure to vocally reassure the horse.  Praise the horse when he is doing well (you can do less of this after a few days).  Once the time is up, prepare to unload the horse.

Step 6:  Open up the trailer door slowly and attach the lead rope to the halter.  Stand in a safe location so that you won’t be run over if the horse bolts out.  Tell the horse, “whoa” as you open the door and make him wait quietly until you ask him to step out of the trailer.

Step 7:  This is a very important step.  Begin by leading the horse back into the trailer and backing him out a couple of times.  If the horse refuses to load, lunge the horse for a couple of minutes and ask again.  Then, load the horse while standing at the back.  This will show how comfortable the horse is with you and the trailer.  You are in a position where you could lock the horse back in the trailer and he knows that.  Ideally, he will load in the trailer and you can be done for the day.  If he refuses, make him work until he decides that rest and the tasty hay inside the trailer is a much better option.  Always reward the horse with lots of praise (and a treat once in awhile) when he loads.

Time Duration:
  • Day 1: 2-3 minutes
  • Day 2: 5 minutes
  • Day 3: 8 minutes
  • Day 4: 10 minutes
  • Day 5: 15 minutes
Times can be adjusted to fit the needs of the horse.  Some horses with be able to increase time much more quickly than others.  Repeat the same amount of time as many days in a row as it takes for the horse to be comfortable with it.  Do not move to a longer time if the horse is anxious with a shorter duration.  Remember, we want the horse to associate the trailer with good things: tasty food and lots of praise!

Case Study: Zeke

Zeke was nervous for the first couple of days that he was locked in the trailer.  He moved around in the trailer quite a bit and his breathing rate increased.  As I continued to work with him, he got more used to waiting in the trailer and would actually settle down to eat.  The best indicator of his improvement was that he willingly loaded back into the trailer (both by leading him in and sending him in) after he had been locked inside.  A few months ago, he would be running away from the trailer if I dared to ask him to load after he had just gotten out of it.  I call that a success!

Training Horse Profile: Wrigley the Mustang

  Training Goals: Start under saddle Continue to build confidence and trust Wrigley is a four-year-old mustang that was recently acquired by...